Description In vitro diagnostic medical device.
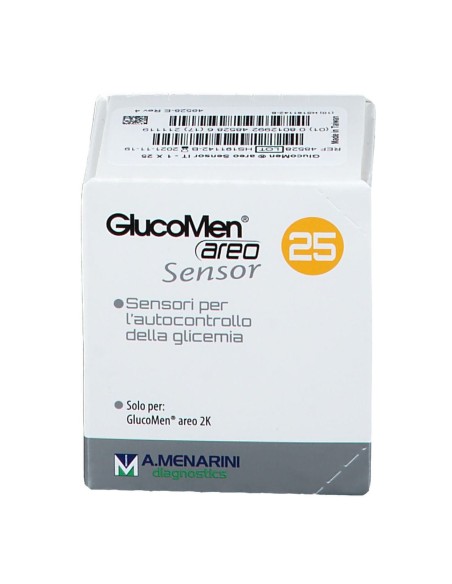
Sensors for the quantitative determination of glucose levels in fresh capillary whole blood; to be used exclusively with the GlucoMen areo 2K meter.
The sensors are designed for monitoring and self-testing of blood glucose levels in people with diabetes mellitus; they can also be used in hospital settings by healthcare professionals.
They are not intended for use in the diagnosis or screening of diabetes or for use in newborns.
Do not change your treatment based on test results without first consulting your doctor or healthcare professional.
General features | Blood glucose measurement | specific for beta-D-glucose in blood |
| Enzyme composition (per cm2) of a blood glucose test strip | - glucose oxidase (from Aspergillus niger), 3.5%
- mediator: hexacyanoferrate (III) ion, 17.5%
- non-reactive substances, 79% |
| Unit of measurement |
| Glucose | mg/dL (cannot be changed) |
| Measurement range |
| Glucose | 20-600 mg/dL |
| Response time |
| Glucose | 5 seconds |
| Sample volume |
| Glucose | 0.5 microL |
| Acceptable haematocrit range |
| Glucose | automatically corrects the measurement according to haematocrit (10-70%) |
| Correlation | plasma equivalent |
| Sample | fresh capillary whole blood |
| Sensor coding | auto-coding |
| Hygiene | automatic test strip ejection via a dedicated eject button |
| Sampling | automatic aspiration of the blood sample by capillary action |
| Alternative site testing (AST) | permitted (palm of the hand and forearm) |
| Operating conditions | temperature range: 5-45°C
humidity: 20%-90% (non-condensing) |
Directions for use 1. Insert a new GlucoMen areo Sensor (white) into the sensor slot. The drop symbol will start flashing on the display and the glucose symbol "Glu" will appear at the bottom left. If nothing appears on the display, remove the sensor, reinsert it into the slot and wait for the drop symbol to start flashing.
For information on how to use the lancing device, read its instructions for use.
2. Hold the tip of the sensor in contact with the drop of blood until the control window is filled. At that point you will hear a beep (if enabled) and the display will show a countdown.
3. Read the test results. A beep will announce that the test result has appeared on the screen with the glucose symbol "Glu".
4. To remove the sensor, press the eject button. The meter will switch off.
Warnings Keep the meter, sensors and other components out of the sight and reach of children. Small parts may pose a choking hazard.
Handle the vial and sensors with clean, dry hands.
Dispose of the vial and used sensors in accordance with local regulations.
Handling blood can be dangerous: take extreme care when handling blood, sensors, lancets and the meter.
Storage Store the sensor vial in a dry place at a temperature of 4-30°C. Do not freeze. Avoid heat and direct sunlight.
Keep all unused sensors in the original vial and, after taking one out, close the cap tightly to preserve their quality. Do not transfer the sensors to other containers.
Do not use the sensors after the expiry date.
Do not use the sensors more than 12 months after first opening the vial. It is recommended to write the disposal date on the label (date of first opening + 12 months).
Strips in unopened packaging have a shelf life of 24 months from the date of manufacture.
Pack size Pack of 25 sensors.
Code 48528